Overview
Fail2Ban is a new feature in Plesk 12 that allows users to set up filters to block ip addresses to prevent things like brute force attacks. The following support articles outlines how to configure Fail2Ban for WordPress. This article assumes you already have Fail2Ban to installed and configured, if not you can read our guide here.
Instructions
-
From the Admin bar on the left hand side menu, click on “Tools & Settings”, then click on “IP Address Banning (Fail2Ban)”.

-
Under “IP Address Banning” click on the “Jails” tab.

-
Under the “Jails” tab, click on “Manage Filters”.

-
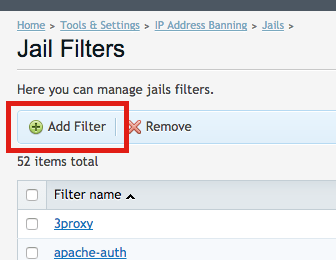
From the “Jail Filters” screen click “Add Filter”.
-
From within the “Add Jail Filter” give the filter a meaningful name in the “Name” field. Then in the “Content” field add the following:

[Definition]
failregex = <HOST>.*] "POST /wp-login.php
ignoreregex =
-
Navigate back to the “Jails” screen. Alternatively you can click on the green arrow “Up Level” icon in the top right hand corner.

-
From under the “Jails” tab click on “Add Jail”.

-
[A] – Under “Name”, give the Jail a meaningful name, we used the same as the filter for ease of management. Under “Filter” select the filter we created in the pervious steps.
[B] – Enter the below details, updating “name=WPLogin” with the name you have give the Filter.
iptables-multiport[name=WPLogin, port="http,https"]
[C] – This step is optional but allows email notifications to be set up for instances of where IP addresses have been jailed. Under “dest” specify the email address notifications are to go to. Then from the “Action” drop down list select “sendmail-whois”.
sendmail-whois[name=WPLogin, dest=YOUR@EMAIL_ADDRESS.com.au]
[D] – Specify the directory of the access log of the site/s.
/var/www/vhosts/system/*/logs/*access*log
[E] – Specify the duration of the ban of an ip address, and the number of attempts before its banned.
Click “OK”. The filter is set up on the server.
