
Overview
This article will guide you through the setup of Automatic Replies through Plesk. Automatic Replies can be used for things such as:
- Out-of-office responses while staff are on holidays
- Instant reply with marketing material or support documents
- Confirmation that the email has been received
For example, you could have an auto reply confirming that a customers order has been received or an out-of-office response while you’re on Christmas holidays.
Instructions
1. Login to Plesk via the Conetix Control Panel.
2. Select Mail on the left hand side menu.

3. Select the mailbox you wish to add the autoresponder to.

4. Select the Auto-Reply Tab.

5. The Auto-Reply Configuration page will open. You will need to complete the following to correctly setup an autoresponder:
[1] Tick Switch on auto-reply.
[2] Give the autoresponder a Subject Heading.
[3] Give the autoresponder a Message to reply with.
[4] OPTIONAL: Setup a rule for all emails received to be forwarded through to a nominated email account.
[5] OPTIONAL: Set the last day that you want the autoresponder active on.
(The autoresponder will switch off the day after the one you set here).
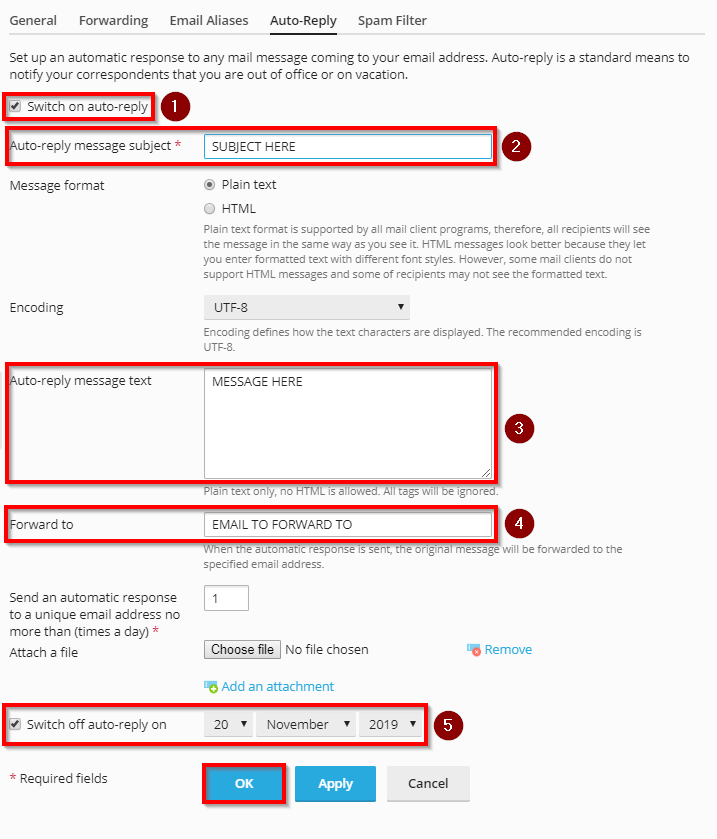
6. When ready, select OK.
That’s it! You have successfully setup an autoresponder through Plesk.