Overview
This article demonstrates how to setup a mailbox within Microsoft Outlook.
Instructions
1. Open Microsoft Outlook.
2. Select File in the top left as shown below.

3. Under the Info tab, select the Account Settings drop down menu and select Manage Profiles.

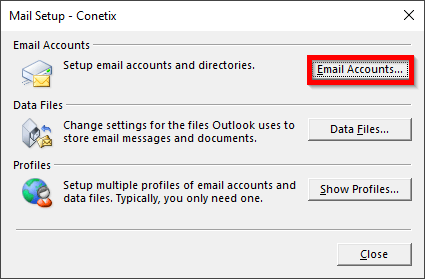
4. Select Email Accounts.
5. Select New.

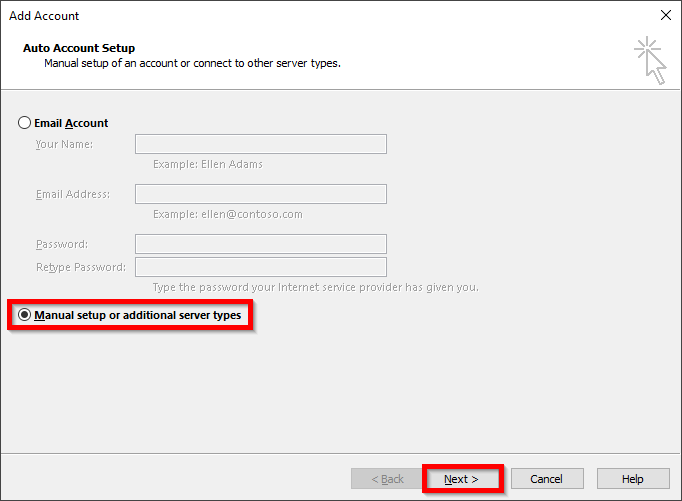
6. Select Manual Setup, then select Next.
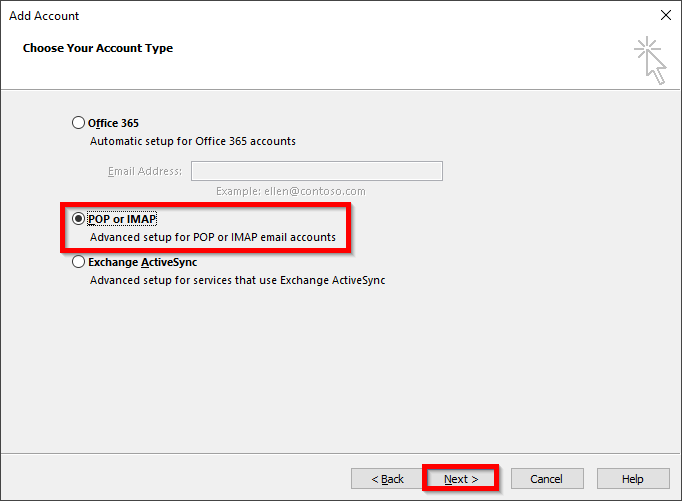
7. Select POP or IMAP, then select Next.
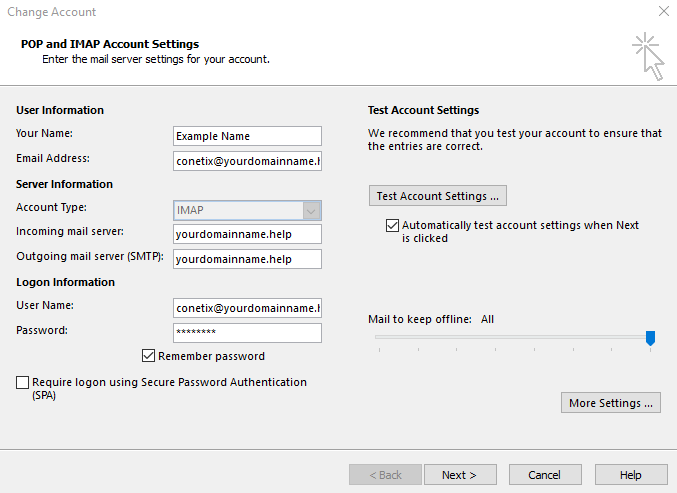
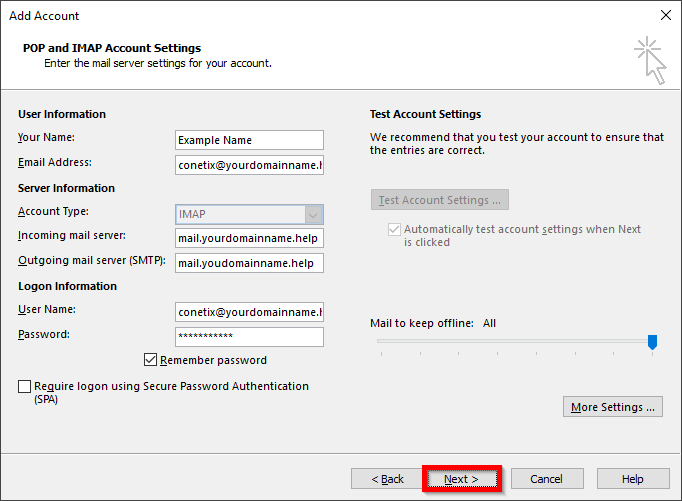
8. Fill out the details with the correct connection settings. These will have been provided to you upon completion of your migration or mailbox creation.
9. Select More Settings and navigate to the Outgoing Server tab.
10. Tick My outgoing server (SMTP) requires authentication as shown below:

11. Navigate to the Advanced tab. Enter the ports and encrypted connection configuration that was provided to you. We’ve provided an example below.

12. Once you’ve entered the connection details, select OK. This will take you back to the Add Account screen. From here, select Next.
13. Outlook will test your account settings and confirm that the configuration is correct.
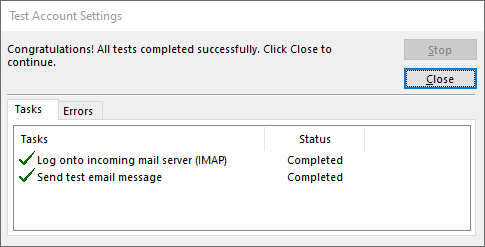
Outlook will display a Congratulations page to indicate that the account setup has completed successfully. Select Finish. You will be returned to Outlook. If the mailbox does not immediately appear, you may need to restart Outlook or your computer.