One of the best things about computers, is that they allow us to automate regular, mundane or low-level tasks, which someone would normally need to repeat or wait around for until they complete. If a task is quick, then this is likely okay. But if it's a regular task or a long running one, then this is definitely not desirable.
Gladly, Plesk provides easy access to the automation layers in the underlying operating systems, such the Cron daemon on Linux/Unix servers and on Windows the Windows Task Scheduler.
Via the common interface, tasks, such as file rotation, security inspection and quota reviews can be run on a recurring basis, with one or more administrators emails notified if and when required. Let's step through creating and maintaining a few regular tasks now.
Creating a Scheduled Task
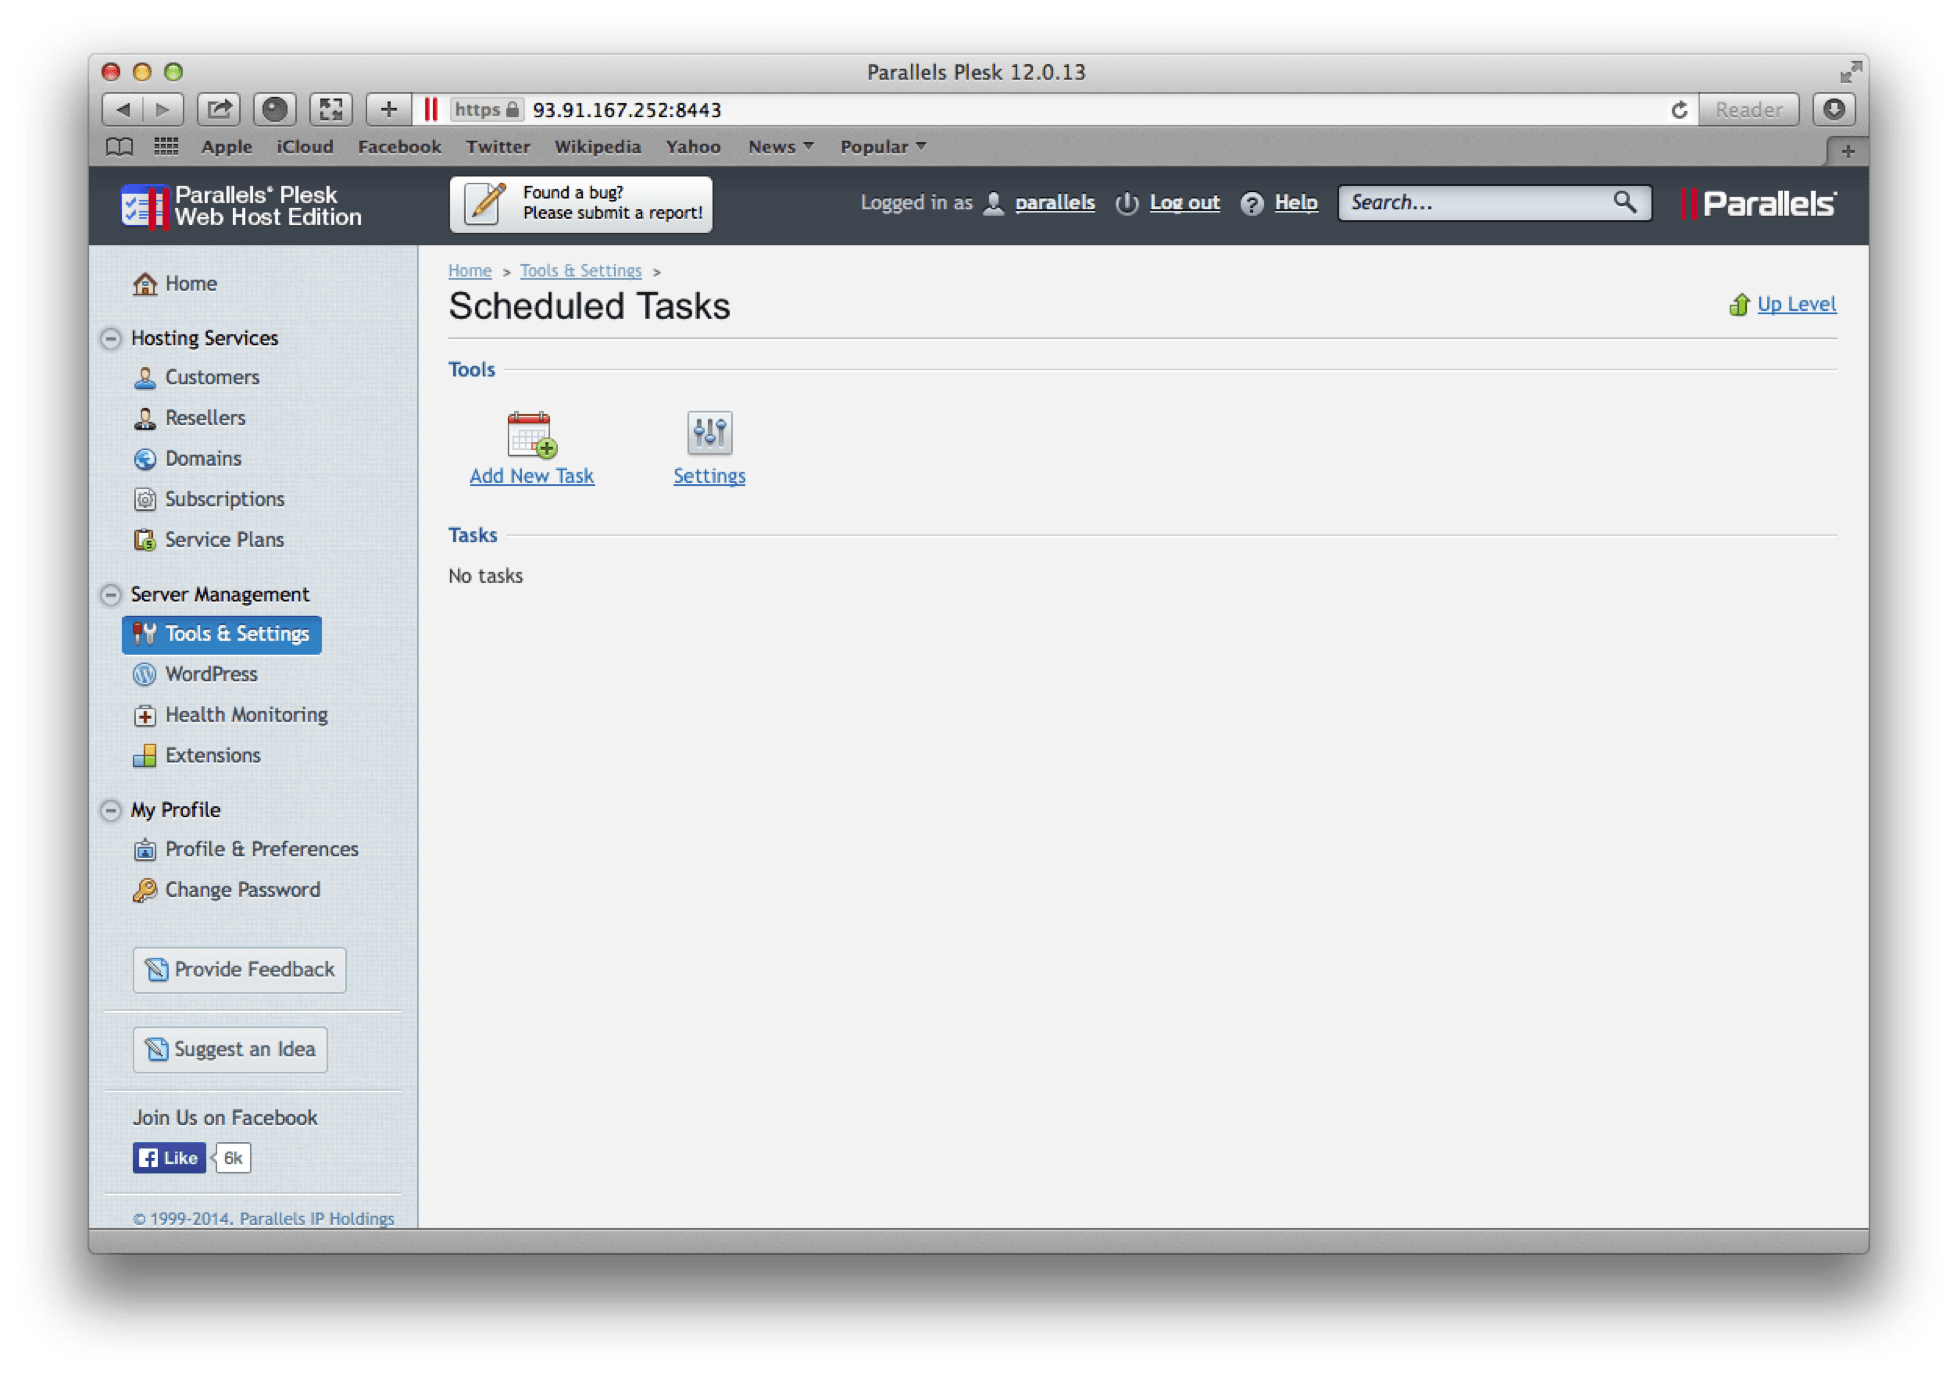
Ok, let's step through creating a scheduled task. First, navigate to the page by click Tools & Settings in the lefthand-side navigation tab under Server Management. Then, under Tools & Resources, click Scheduled Tasks. Initially you'll see the screen below.

Here, you're seeing all of the system users, who tasks can be assigned to. In this example, we're going to create a scheduled task for the Nginx user, where it parses the access log file, once a week, retrieving a count of the number of requests served.
I admit, this isn't the most complex of tasks, but it's enough to demonstrate the scheduled task functionality. Let's step through that now.
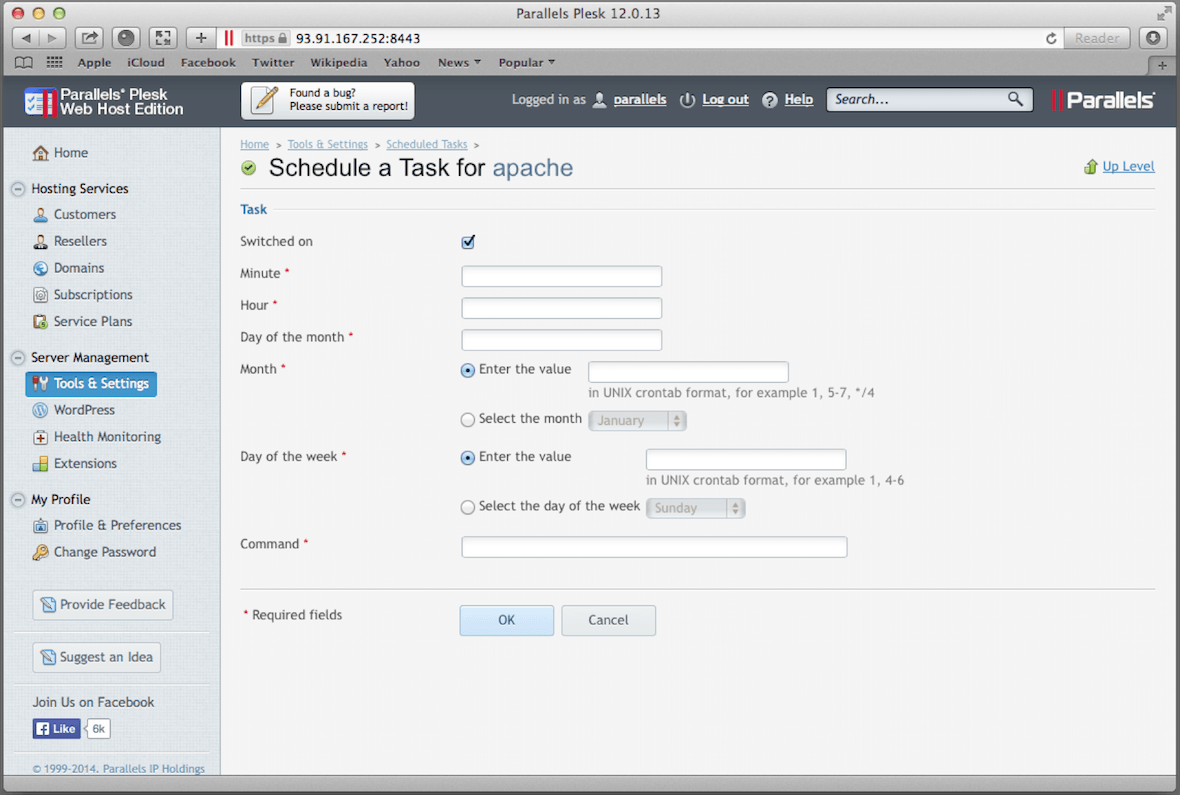
Assuming that this is the first time a scheduled task is being added for the user, first click Add New Task, which will take you to the schedule a task for nginx in the screenshot earlier. Then, fill in the details as follows:
Option/Setting
Minute: 0
Hour: 0
Day of the Month: 1
Month: *
Day of the Week: *
Command: `wc -l /var/log/nginx/access.log
In case you're not familiar, the wc -l /var/log/nginx/access.log would output wc -l /var/log/nginx/access.log. As we're only interested in the count, we pipe it through awk to strip out everything else.

Now that the scheduled task is created, we need to make sure that the Scheduler notification is enabled for the user, which by default it's not. Ok, it's not strictly necessary, more of a nice to have; but it can be handy to be reminded that a job ran.
So click Settings and ensure that sending is enabled for either the default email address, or to a specified address, as in the screenshot below, where I've chosen the default.

Updating, Suspending and Deleting Scheduled Tasks
If later you want to suspend or update the task, click the command in the tasks list to display the task details, and uncheck Switched on to suspend it. That way, should you want to re-enable it later, you don't have to recreate it. Alternatively, update the other fields as needed.
If you want to delete a scheduled task, check the task in the tasks list, then click Remove in the blue search bar above the tasks list.

Wrapping Up
Right, so this wasn't a long post, but covered the essentials of managing scheduled tasks when using Plesk. I hope that it's given you all the key information you need to stay on top of this area, as well as to save you time you could be spending elsewhere. If you need any further information, leave a comment or get in touch with us.